Showing posts with label how to make. Show all posts
 Have you picked up this month's magazine issue of 
PaperCraft Inspirations (Issue 84, March 2011)?!


If so, make sure to check out page 57, where Kroma Design Studio's 
Pink & Brown Cupcake Theme Cupcake Toppers have been featured!


A special thank you to card designer, Louise Fortune and the PaperCraft Inspiration team
for choosing to feature one of my complimentary designs in their article of 
"Quick & Easy Cards - 16 fun designs for you to make in minutes!"

This article is so eye candy and presents in such a pretty manner plenty of 
Do-It-Yourself card ideas for 
cupcake themed birthday parties, Mother's Day, Thank You cards, 
and much more!


or

This issue is a must have with all the cute templates, patterns, and online resources it has to creative DIY ideas, especially for party stationary!  Plus, I loved my FREE little gift!  The best part is that no matter which issue you choose to purchase, you receive a FREE crafting tool as a gift.  Now what more can you ask for to get you started?!


Whether it's for crafting card ideas or even to order your very own subscription,


Saturday, March 19, 2011 Valita Gal
 Have you picked up this month's magazine issue of 
PaperCraft Inspirations (Issue 84, March 2011)?!


If so, make sure to check out page 57, where Kroma Design Studio's 
Pink & Brown Cupcake Theme Cupcake Toppers have been featured!


A special thank you to card designer, Louise Fortune and the PaperCraft Inspiration team
for choosing to feature one of my complimentary designs in their article of 
"Quick & Easy Cards - 16 fun designs for you to make in minutes!"

This article is so eye candy and presents in such a pretty manner plenty of 
Do-It-Yourself card ideas for 
cupcake themed birthday parties, Mother's Day, Thank You cards, 
and much more!


or

This issue is a must have with all the cute templates, patterns, and online resources it has to creative DIY ideas, especially for party stationary!  Plus, I loved my FREE little gift!  The best part is that no matter which issue you choose to purchase, you receive a FREE crafting tool as a gift.  Now what more can you ask for to get you started?!


Whether it's for crafting card ideas or even to order your very own subscription,


Birthday parties and Halloween are just around the corner!

Thinking about dressing up your child as a ballerina, fairy princess, tinkerbell, or butterfly?  
Then look no further and challenge yourself in designing your child's tutu with this easy DIY no sew video tutorial that worked for my daughter's *Little Ballerina* 4th Birthday Party!  


that I followed by Julie Figueroa:


However, my tutu's were a craft that each child got to creatively craft on their own at my daughter's ballerina party, along with matching hair clips.  They got to decorate their tutu's and hair clips by choosing from a variety of colorful ribbons, flowers, and rhinestones!


For more details on this Little Ballerina Party theme and DIY printable party accessories, 

If you encounter questions about how to make this "no sew" tutu, 
feel free to ask us on our facebook page.


~*~

Adorable accessories that you can add onto your little girl's tutu are featured below:


Purple Fairy Wings, crafted by Kroma Design Studio


Pretty in Pink Little Girl Bracelet, crafted by Gorgeous Georgia


Fairy Wand, crafted by Cara Magic
 

Hailey Floral Hair Clip, crafted by Vee & Elle

Monday, October 04, 2010 Valita Gal

Birthday parties and Halloween are just around the corner!

Thinking about dressing up your child as a ballerina, fairy princess, tinkerbell, or butterfly?  
Then look no further and challenge yourself in designing your child's tutu with this easy DIY no sew video tutorial that worked for my daughter's *Little Ballerina* 4th Birthday Party!  


that I followed by Julie Figueroa:


However, my tutu's were a craft that each child got to creatively craft on their own at my daughter's ballerina party, along with matching hair clips.  They got to decorate their tutu's and hair clips by choosing from a variety of colorful ribbons, flowers, and rhinestones!


For more details on this Little Ballerina Party theme and DIY printable party accessories, 

If you encounter questions about how to make this "no sew" tutu, 
feel free to ask us on our facebook page.


~*~

Adorable accessories that you can add onto your little girl's tutu are featured below:


Purple Fairy Wings, crafted by Kroma Design Studio


Pretty in Pink Little Girl Bracelet, crafted by Gorgeous Georgia


Fairy Wand, crafted by Cara Magic
 

Hailey Floral Hair Clip, crafted by Vee & Elle

Have you ever encountered a moment in where you just couldn't find the perfect cake or cupcake stand?!  Well you don't have to look any further!  Why not try this easy and affordable DIY Cake Stand Tutorial for your next party or event, created by Jennie of A Well Crafted Party especially for Eat • Drink • Pretty's site.


How to make your own Cake or Cupcake Stand Tutorial
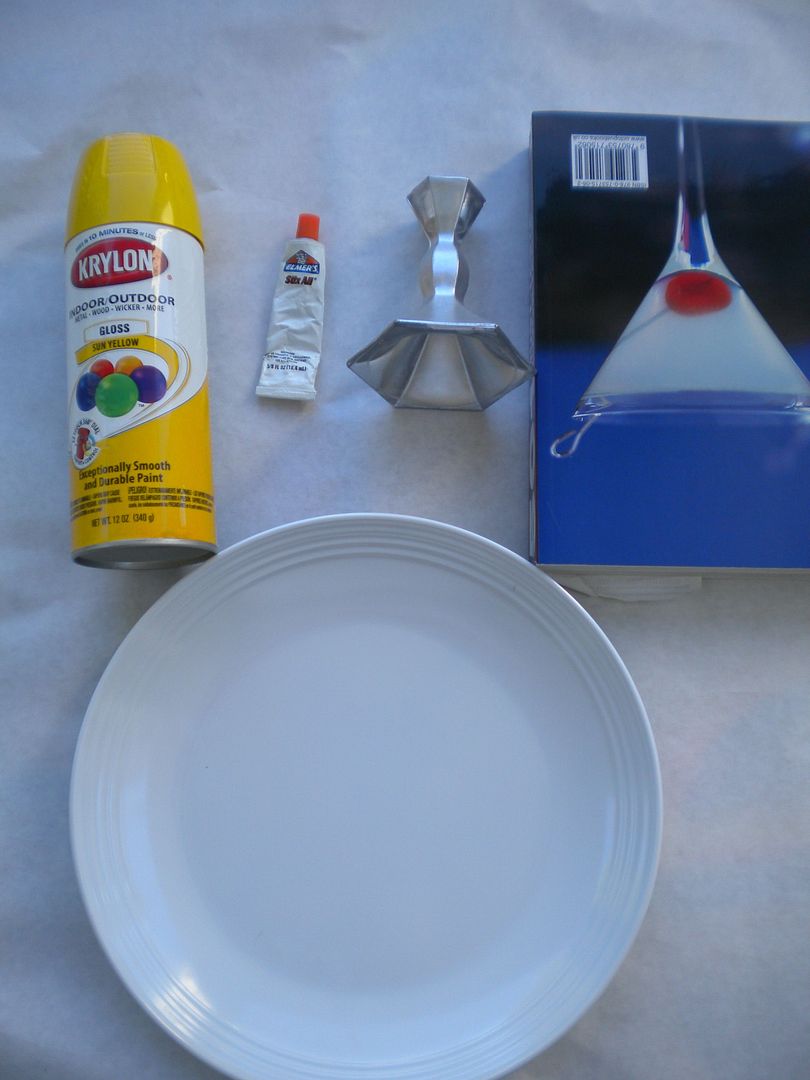
Needed Materials:
1 plate
1 candle stick or goblet
Epoxy
1 heavy book
1 can of spray paint (I really like the way gloss looks for this project)
a sheet or paper to protect surfaces while painting

Making a home-made cake stand is incredibly easy. First, start of with a plate—any plate will work but I recommend using one that has the color or image you would like at the top of the stand as this will not be painted to keep the cake stand food friendly. Next, find a candle stick, goblet or really any sturdy object that is the height that you would like for your finished stand. I have used both candle sticks and goblets in the past.
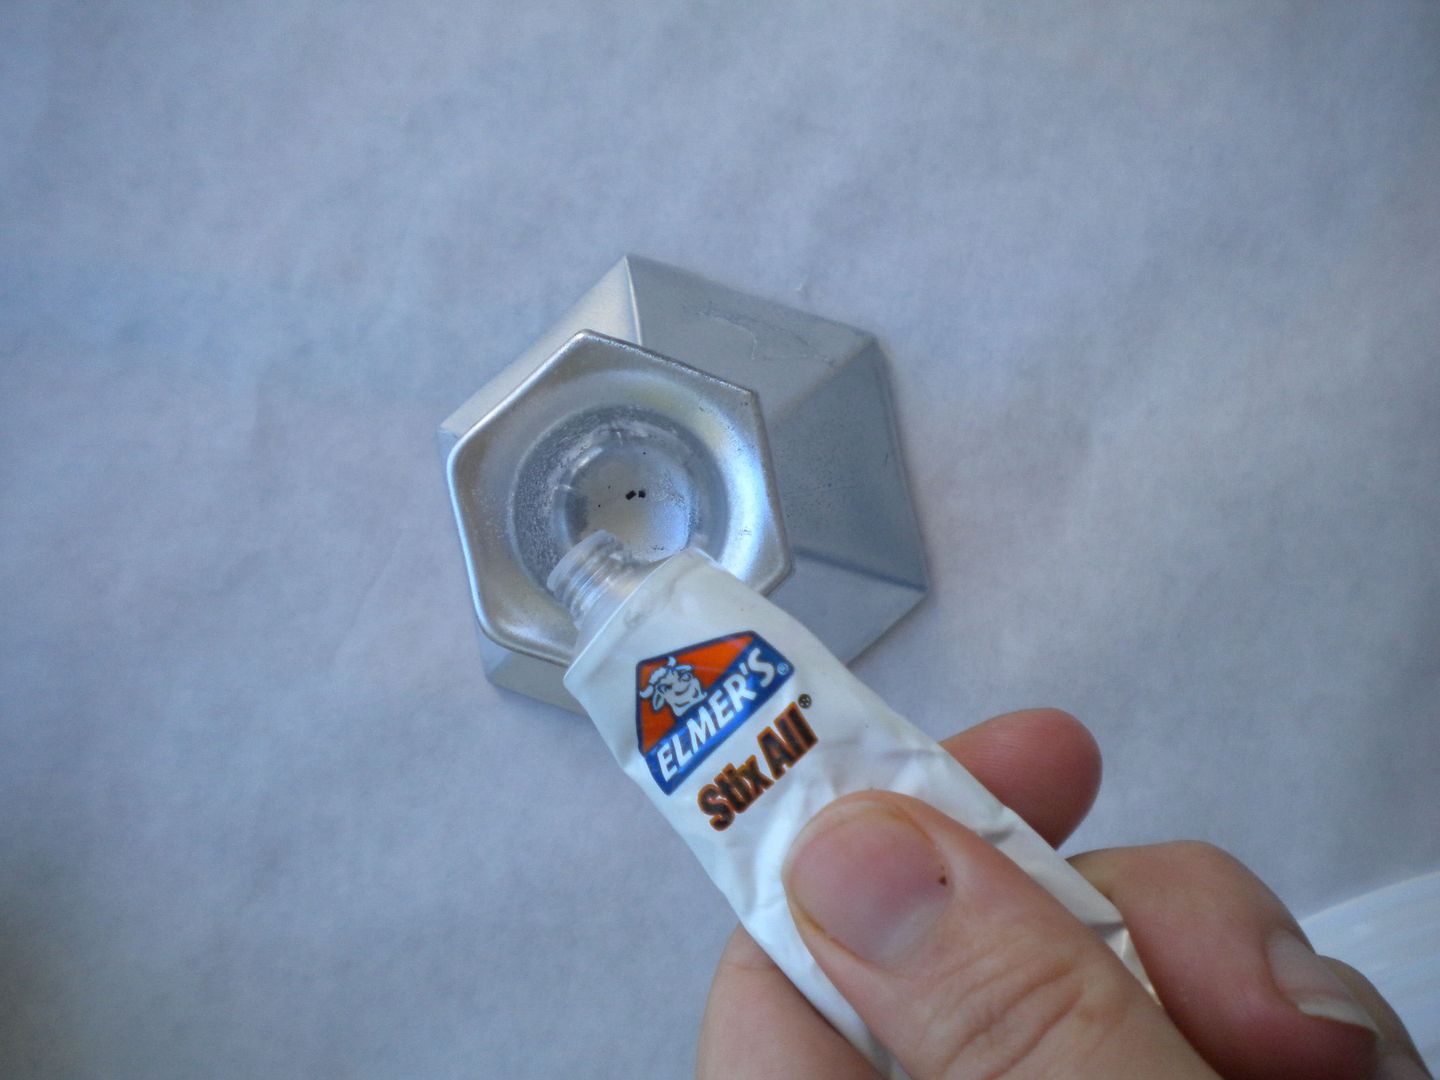
Then take epoxy (use according to directions) and glue your candlestick or goblet to the bottom of the plate. DO NOT MOVE THE STAND.
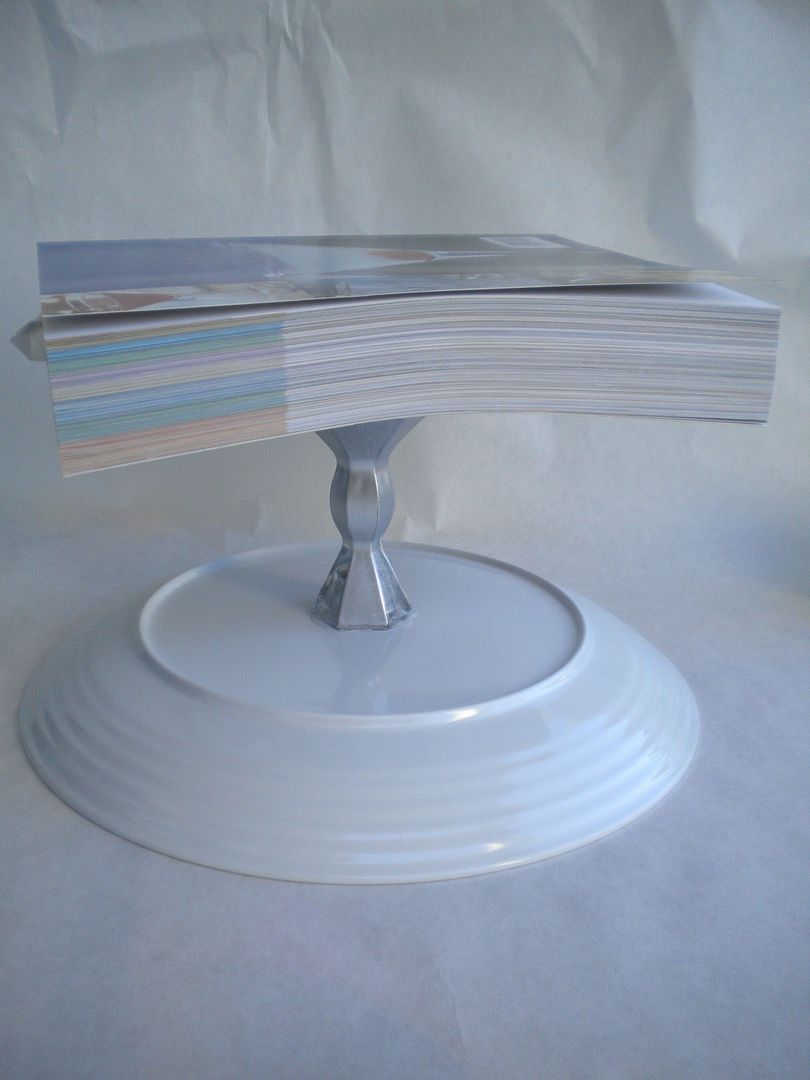
Place a heavy book on top of the stand and let the epoxy set according to directions. After the epoxy has set you should be able to pick up the stand with no movement from the candlestick or plate
Make sure the plate is set firmly on a protected surface so that you can spray paint the outside of the cake stand. If there are edges of the paint off of the paper I would suggest covering the top of the plate with paper or painters tape
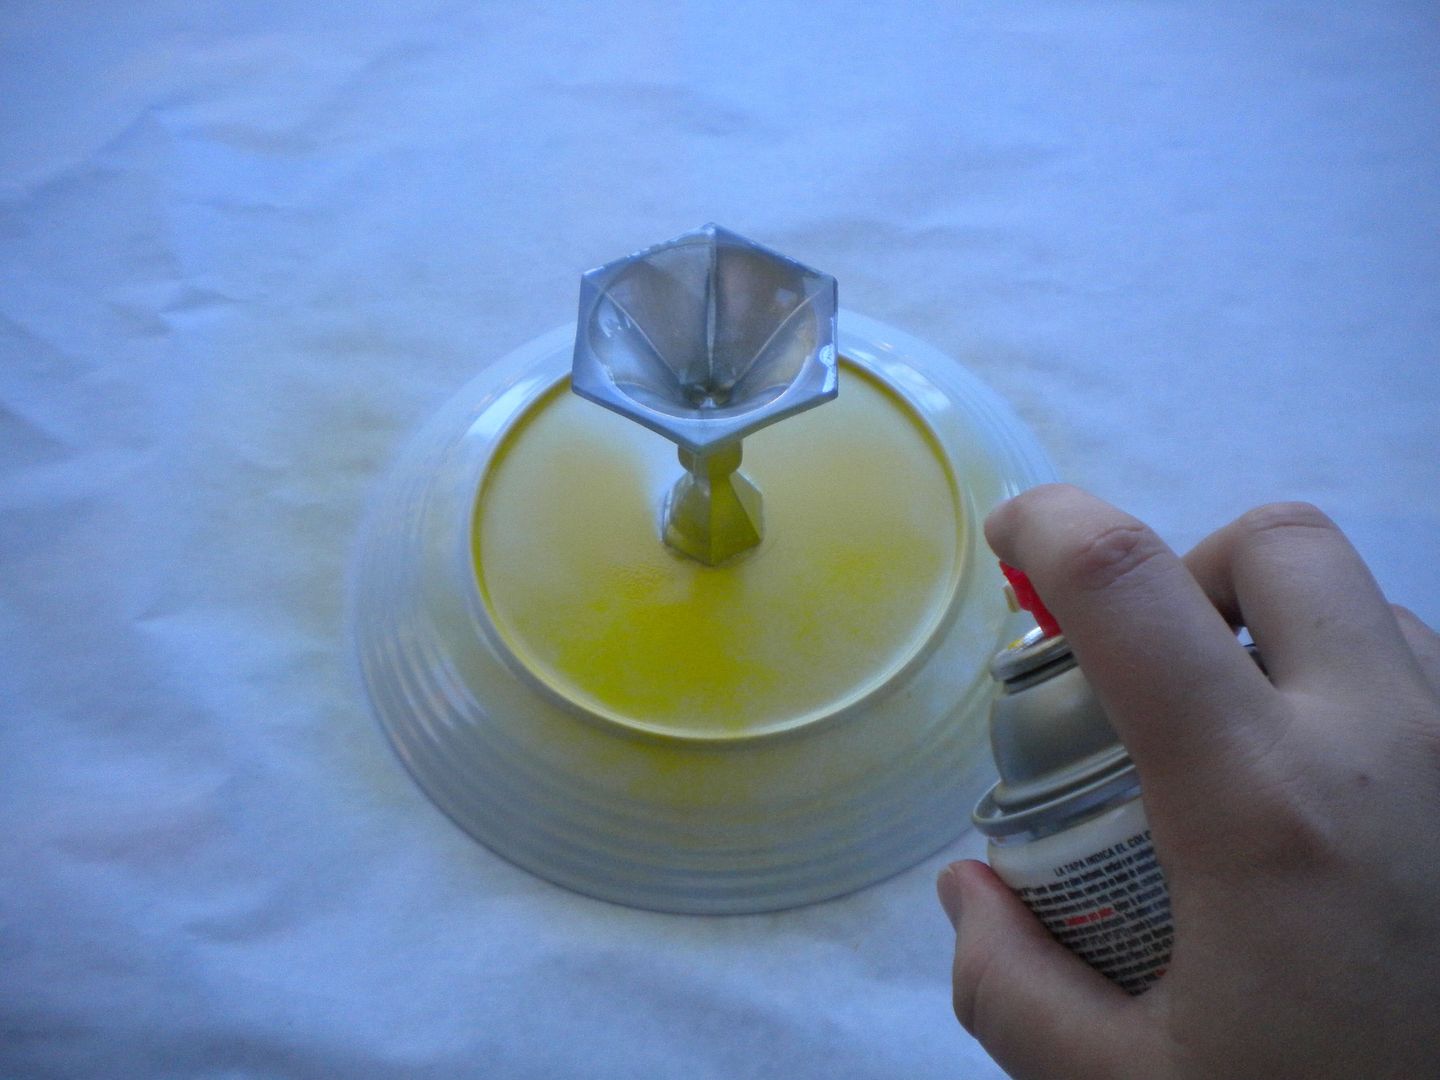
Spray the entire outer surface according to the directions on the spray paint can. Take your time on this step and stand back far enough to avoid drips. Also, this step make take a couple of layers of paint so plan to make the stands at least a day in advance of your party.
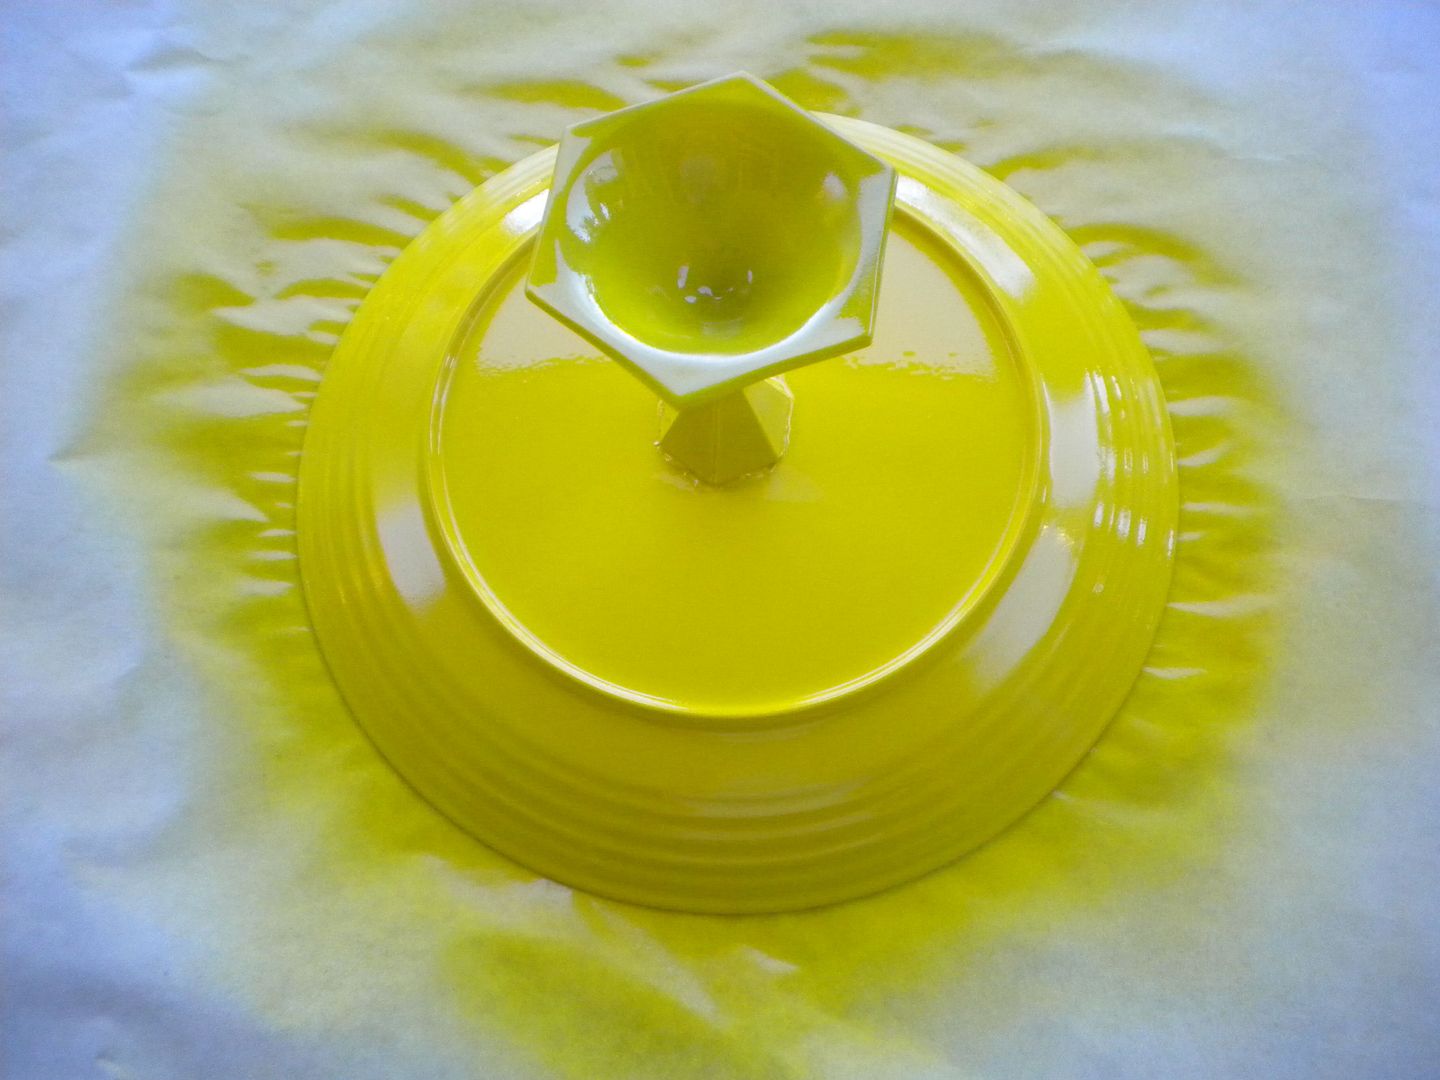
After the stand has dried, wash the top of the plate with dish soap and water. The stand is not dishwasher safe but is food friendly as long as food is not touching the painted surfaces. If you are worried about this then just place a doily or wax paper on top of the stand before putting food on it.
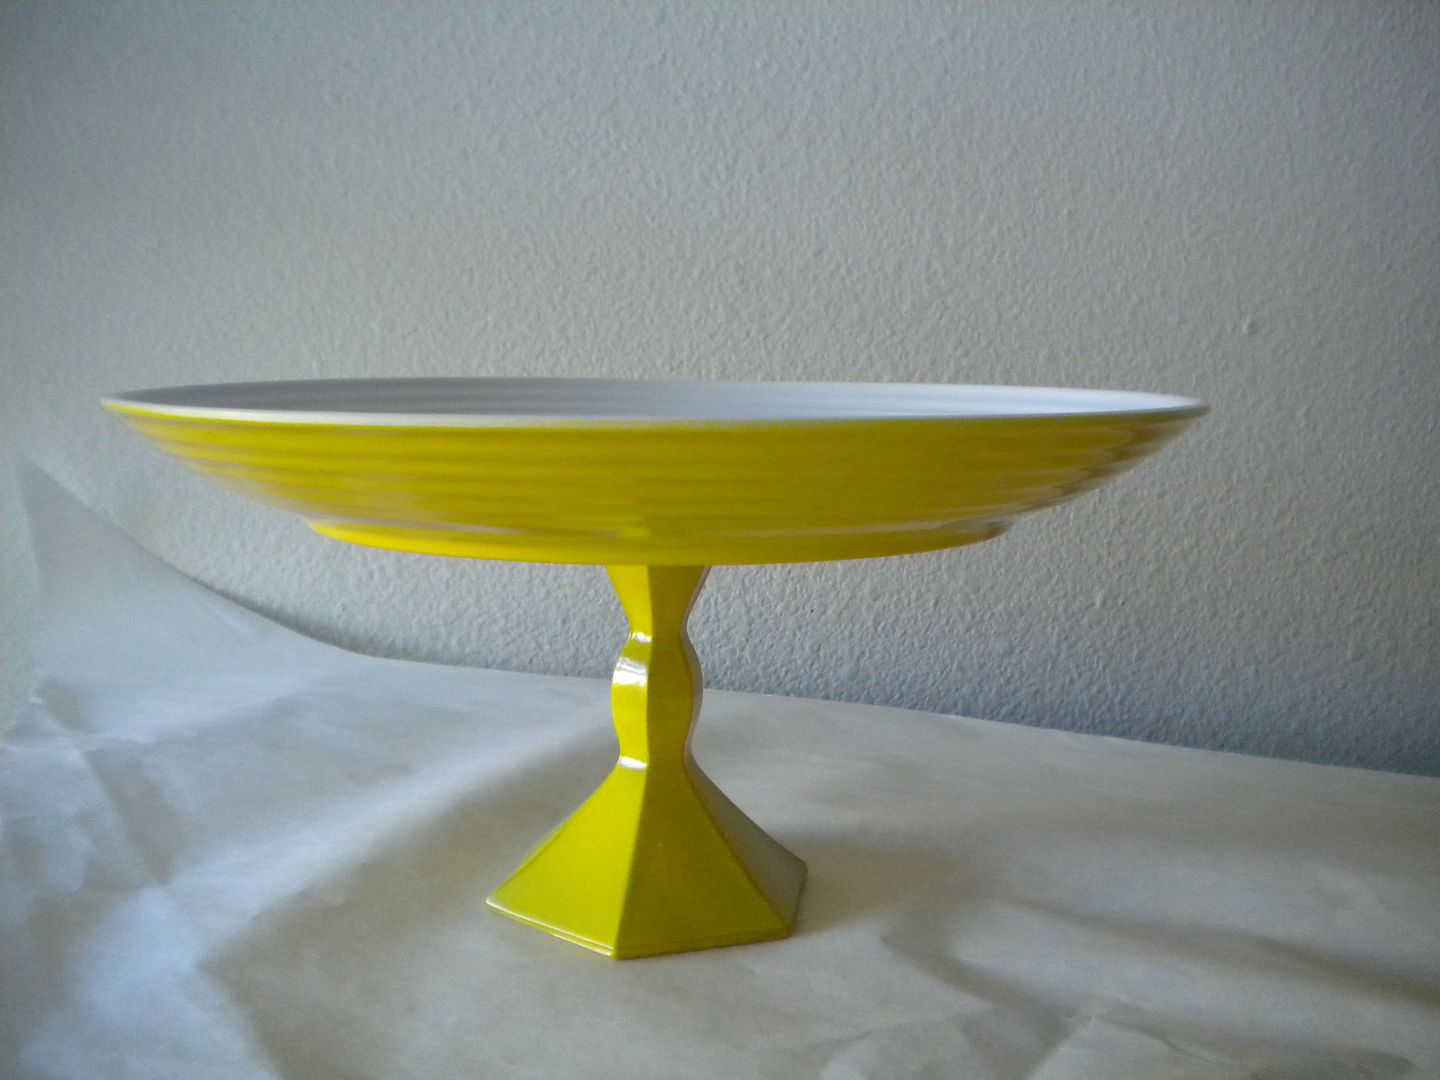

Tutorial by:  Jennie of A Well Crafted Party
Thursday, September 30, 2010 Valita Gal
Have you ever encountered a moment in where you just couldn't find the perfect cake or cupcake stand?!  Well you don't have to look any further!  Why not try this easy and affordable DIY Cake Stand Tutorial for your next party or event, created by Jennie of A Well Crafted Party especially for Eat • Drink • Pretty's site.


How to make your own Cake or Cupcake Stand Tutorial
Needed Materials:
1 plate
1 candle stick or goblet
Epoxy
1 heavy book
1 can of spray paint (I really like the way gloss looks for this project)
a sheet or paper to protect surfaces while painting

Making a home-made cake stand is incredibly easy. First, start of with a plate—any plate will work but I recommend using one that has the color or image you would like at the top of the stand as this will not be painted to keep the cake stand food friendly. Next, find a candle stick, goblet or really any sturdy object that is the height that you would like for your finished stand. I have used both candle sticks and goblets in the past.
Then take epoxy (use according to directions) and glue your candlestick or goblet to the bottom of the plate. DO NOT MOVE THE STAND.
Place a heavy book on top of the stand and let the epoxy set according to directions. After the epoxy has set you should be able to pick up the stand with no movement from the candlestick or plate
Make sure the plate is set firmly on a protected surface so that you can spray paint the outside of the cake stand. If there are edges of the paint off of the paper I would suggest covering the top of the plate with paper or painters tape
Spray the entire outer surface according to the directions on the spray paint can. Take your time on this step and stand back far enough to avoid drips. Also, this step make take a couple of layers of paint so plan to make the stands at least a day in advance of your party.
After the stand has dried, wash the top of the plate with dish soap and water. The stand is not dishwasher safe but is food friendly as long as food is not touching the painted surfaces. If you are worried about this then just place a doily or wax paper on top of the stand before putting food on it.


Tutorial by:  Jennie of A Well Crafted Party