Summer is almost over!  What better way to celebrate the end than with the cutest
Cupcake Skewers!

came up with this great "Do It Yourself Guide to making Cupcake Skewers."  
Enjoy...
Step 1
Fill your mini cupcake baking pan with your cake batter. I use a small scoop but you can use a spoon too. Fill to 1/3-1/2 full in each baking cavity.
cupcake skewer how to make step 1
Step 2
Admire your cooling mini cupcakes. Do not touch! Let cool completely.
cupcake skewer how to make step 2
Step 3
Gather your skewers. You can use grilling skewers or lollipop sticks (shown below). Whatever you prefer is fine! Then place several cupcakes on a working surface. Find a round cookie cutter that is between 1.5-2.5 inches across. I have used various sizes, just be sure it’s a little smaller than your baked mini cupcake.
Step 4
Flip baked mini cupcakes upside down. Using small round cutter, push through and discard of edges.
Step 5
Gather some fun ribbons and tie either a knot or bow about an inch down from skewer or stick. If you don’t want to use ribbon, then wrap a piece of aluminum foil around stick or twine, or something that will help the cupcake not slide down the stick!
Step 6.
Place your cupcake on stick. I find it easiest to keep the cupcake right side up when skewering. Top with your favorite icing!
Step 7
Adorn with your favorite sprinkles, flowers, glitter, toppers, whatever your heart desires!
Tuesday, August 31, 2010 Valita Gal


Summer is almost over!  What better way to celebrate the end than with the cutest
Cupcake Skewers!

came up with this great "Do It Yourself Guide to making Cupcake Skewers."  
Enjoy...
Step 1
Fill your mini cupcake baking pan with your cake batter. I use a small scoop but you can use a spoon too. Fill to 1/3-1/2 full in each baking cavity.
cupcake skewer how to make step 1
Step 2
Admire your cooling mini cupcakes. Do not touch! Let cool completely.
cupcake skewer how to make step 2
Step 3
Gather your skewers. You can use grilling skewers or lollipop sticks (shown below). Whatever you prefer is fine! Then place several cupcakes on a working surface. Find a round cookie cutter that is between 1.5-2.5 inches across. I have used various sizes, just be sure it’s a little smaller than your baked mini cupcake.
Step 4
Flip baked mini cupcakes upside down. Using small round cutter, push through and discard of edges.
Step 5
Gather some fun ribbons and tie either a knot or bow about an inch down from skewer or stick. If you don’t want to use ribbon, then wrap a piece of aluminum foil around stick or twine, or something that will help the cupcake not slide down the stick!
Step 6.
Place your cupcake on stick. I find it easiest to keep the cupcake right side up when skewering. Top with your favorite icing!
Step 7
Adorn with your favorite sprinkles, flowers, glitter, toppers, whatever your heart desires!

deliciously sweet and pretty dessert treat, Strawberry-Sugar Biscuit Trifle.


Checkout out the recipe below, serves 10 to 12.

Ingredients

  • Sugar Biscuits
  • 6  tablespoons  orange liqueur or orange juice, divided
  • 2 1/2  pounds  strawberries, halved
  • Trifle Custard
  • 1 1/2  cups  whipping cream
  • 1/4  cup  plus 2 tablespoons powdered sugar
  • Garnishes: strawberries, mint leaves

Preparation

Cut Sugar Biscuits in half; brush cut sides evenly with 5 tablespoons orange liqueur.
Line bottom of a 4-quart bowl or trifle bowl with eight Sugar Biscuit halves. Arrange strawberry halves around lower edge of bowl. Spoon one-third of Trifle Custard evenly over Sugar Biscuit halves; top with one-third of remaining strawberry halves. Repeat layers twice, ending with strawberry layer. Drizzle remaining orange liqueur evenly over top. Cover and chill 3 to 4 hours.
Beat whipping cream until foamy; gradually add powdered sugar, beating until soft peaks form. Spread over trifle; serve immediately. Garnish, if desired.
Thursday, August 26, 2010 Valita Gal

deliciously sweet and pretty dessert treat, Strawberry-Sugar Biscuit Trifle.


Checkout out the recipe below, serves 10 to 12.

Ingredients

  • Sugar Biscuits
  • 6  tablespoons  orange liqueur or orange juice, divided
  • 2 1/2  pounds  strawberries, halved
  • Trifle Custard
  • 1 1/2  cups  whipping cream
  • 1/4  cup  plus 2 tablespoons powdered sugar
  • Garnishes: strawberries, mint leaves

Preparation

Cut Sugar Biscuits in half; brush cut sides evenly with 5 tablespoons orange liqueur.
Line bottom of a 4-quart bowl or trifle bowl with eight Sugar Biscuit halves. Arrange strawberry halves around lower edge of bowl. Spoon one-third of Trifle Custard evenly over Sugar Biscuit halves; top with one-third of remaining strawberry halves. Repeat layers twice, ending with strawberry layer. Drizzle remaining orange liqueur evenly over top. Cover and chill 3 to 4 hours.
Beat whipping cream until foamy; gradually add powdered sugar, beating until soft peaks form. Spread over trifle; serve immediately. Garnish, if desired.
This exquisite and elegant Peacock Inspired Engagement Theme is a must see;
styled by the fabulous and talented Courtney of Pizzazzerie!

~*~

These elegant invites below were exclusively designed for Courtney by My Personal Artist.


As featured on

Take a peak of the lovely detail design throughout this party...


Cupcakes & Dessert Table


Personalized water bottle labels


Favors: *Smores*


Appetizers & Goodies


VENDORS & RESOURCES:
• Photography – Kristen Steele Photography
• Placecards and Signs – My Personal Artist
• Monogram, Cupcake Flags, and Water Bottle Labels – Blush Printables
• Drink Stirrers – Twirlie Whirlies
• Cookies – Better Bit of Butter
• Smores – Sweet Lydia’s
• Peacock Feathers and Ostrich Plumes – Fabulous Feathers
Wednesday, August 25, 2010 Valita Gal
This exquisite and elegant Peacock Inspired Engagement Theme is a must see;
styled by the fabulous and talented Courtney of Pizzazzerie!

~*~

These elegant invites below were exclusively designed for Courtney by My Personal Artist.


As featured on

Take a peak of the lovely detail design throughout this party...


Cupcakes & Dessert Table


Personalized water bottle labels


Favors: *Smores*


Appetizers & Goodies


VENDORS & RESOURCES:
• Photography – Kristen Steele Photography
• Placecards and Signs – My Personal Artist
• Monogram, Cupcake Flags, and Water Bottle Labels – Blush Printables
• Drink Stirrers – Twirlie Whirlies
• Cookies – Better Bit of Butter
• Smores – Sweet Lydia’s
• Peacock Feathers and Ostrich Plumes – Fabulous Feathers
Today I want to feature this adorable project that I worked on for 
*Girl Scouts Troop 175 in Miami, Florida.*

The troop leader and moms came up with a wonderful idea to create a special design for their troop that would include a graphic representing their daisies, brownies, and juniors.


Their intentions for the design was to have them placed onto cute little string bag totes for the girls, in where they can place all their Girl Scout supplies or crafts for the day.


The tote graphic was a Do It Yourself Iron on Decal printed by Kroma Design Studio,
which came with instructions on how to iron it onto the cotton material.

If you are interested in our professional graphic services, parties & events design service, and (or) purchasing one of our custom iron on printed decals, 
visit our Etsy shop or e-mail val@kromadesign.com.


Lastly, as a complimentary gift, we gave our clients a printable sticker file 
that can be printed on full sized sheet labels and then cut out, 
so that the girls can place them on their craft boxes and other girl scout supplies
....which they all delightfully enjoyed! 


~*~

TOTE BAGS FOR WHOLESALE PRICING
{BLANK or WITH DESIGN}

You can now order from us blank or custom designed tote bags in a variety of colors and materials
for wholesale pricing, contact val@kromadesign.com
if you are interested in these options - email us with what you are looking for 
{specify your desired quantity, material type, and colors}.

Tuesday, August 24, 2010 Valita Gal
Today I want to feature this adorable project that I worked on for 
*Girl Scouts Troop 175 in Miami, Florida.*

The troop leader and moms came up with a wonderful idea to create a special design for their troop that would include a graphic representing their daisies, brownies, and juniors.


Their intentions for the design was to have them placed onto cute little string bag totes for the girls, in where they can place all their Girl Scout supplies or crafts for the day.


The tote graphic was a Do It Yourself Iron on Decal printed by Kroma Design Studio,
which came with instructions on how to iron it onto the cotton material.

If you are interested in our professional graphic services, parties & events design service, and (or) purchasing one of our custom iron on printed decals, 
visit our Etsy shop or e-mail val@kromadesign.com.


Lastly, as a complimentary gift, we gave our clients a printable sticker file 
that can be printed on full sized sheet labels and then cut out, 
so that the girls can place them on their craft boxes and other girl scout supplies
....which they all delightfully enjoyed! 


~*~

TOTE BAGS FOR WHOLESALE PRICING
{BLANK or WITH DESIGN}

You can now order from us blank or custom designed tote bags in a variety of colors and materials
for wholesale pricing, contact val@kromadesign.com
if you are interested in these options - email us with what you are looking for 
{specify your desired quantity, material type, and colors}.

What better way to celebrate your child's back to school with a delicious welcome surprise in their lunch bags!  Try out this fun cupcake decorating recipe from Family Fun Magazine, that your child and friends will be sure to enjoy!
Ingredients
  • Yellow, green, and white frosting
  • Cupcakes
  • Red Skittles or M&M's
  • Small plastic bag
  • Rubber band or twist tie
  • Chocolate-covered graham crackers
  • White Good & Plenty candies
Instructions
  1. Cover the cupcakes with yellow frosting and allow them to sit for an hour before decorating. Dab each red Skittle or M&M with a bit of green frosting for the apple's leaf, then set them aside.
  2. Put a tablespoon or two of white frosting into a small plastic bag for piping. Cut a very small hole in a corner of the bag, twist the top of the bag closed, and secure it with a rubber band or twist tie. Piping the frosting gently out of the hole, write messages on the chocolate-covered graham crackers. Leave space at the bottom of the cookie, where it'll be stuck into the cupcake.
  3. Cut a groove in the cupcake's frosting with a knife, then fit a blackboard into the groove. Add one Skittle or M&M apple and a piece of Good & Plenty chalk, as shown.
From FamilyFun Magazine
Monday, August 23, 2010 Valita Gal
What better way to celebrate your child's back to school with a delicious welcome surprise in their lunch bags!  Try out this fun cupcake decorating recipe from Family Fun Magazine, that your child and friends will be sure to enjoy!
Ingredients
  • Yellow, green, and white frosting
  • Cupcakes
  • Red Skittles or M&M's
  • Small plastic bag
  • Rubber band or twist tie
  • Chocolate-covered graham crackers
  • White Good & Plenty candies
Instructions
  1. Cover the cupcakes with yellow frosting and allow them to sit for an hour before decorating. Dab each red Skittle or M&M with a bit of green frosting for the apple's leaf, then set them aside.
  2. Put a tablespoon or two of white frosting into a small plastic bag for piping. Cut a very small hole in a corner of the bag, twist the top of the bag closed, and secure it with a rubber band or twist tie. Piping the frosting gently out of the hole, write messages on the chocolate-covered graham crackers. Leave space at the bottom of the cookie, where it'll be stuck into the cupcake.
  3. Cut a groove in the cupcake's frosting with a knife, then fit a blackboard into the groove. Add one Skittle or M&M apple and a piece of Good & Plenty chalk, as shown.
From FamilyFun Magazine
It's Back-to-School time and what better way to welcome your child's teacher with this adorable
Teacher Appreciation candy box filled with some sweet treats!


These treat boxes can be delightfully filled with wrapped chocolates such as Lindt truffles, Ghirardelli SquaresHershey Nuggets, Hershey Miniatures, Hershey Kisses, and much more! 

The sweet possibilities are endless!


Teacher Appreciation Triangle Treat Box Template
{Click this link to download this free template}

We also have a freebie for Teachers!

Apple Cut Outs...


This sample display above was used by my daughter's Pre-K Teacher
to display the names of the little children in her class!  
How cute is that!?

There are so many ways you can get creative with these cute little apple cut outs.

Apple Cut Outs for Teachers


Please feel free to submit your photos to our blog for these DIY Back to School Projects!

Enjoy! 


Friday, August 20, 2010 Valita Gal
It's Back-to-School time and what better way to welcome your child's teacher with this adorable
Teacher Appreciation candy box filled with some sweet treats!


These treat boxes can be delightfully filled with wrapped chocolates such as Lindt truffles, Ghirardelli SquaresHershey Nuggets, Hershey Miniatures, Hershey Kisses, and much more! 

The sweet possibilities are endless!


Teacher Appreciation Triangle Treat Box Template
{Click this link to download this free template}

We also have a freebie for Teachers!

Apple Cut Outs...


This sample display above was used by my daughter's Pre-K Teacher
to display the names of the little children in her class!  
How cute is that!?

There are so many ways you can get creative with these cute little apple cut outs.

Apple Cut Outs for Teachers


Please feel free to submit your photos to our blog for these DIY Back to School Projects!

Enjoy! 


INGREDIENTS:
• 1 cup sugar
  • • 1/3 cup HERSHEY'S Cocoa
  • • 1 envelope unflavored gelatin
  • • 1-1/3 cups lowfat 2% milk
  • • 2 containers (8 oz. each) vanilla lowfat yogurt
  • • 1 teaspoon vanilla extract
  • • Kiwi, raspberries or sliced fresh strawberries


  • DIRECTIONS:
  • 1. Stir together sugar, cocoa and gelatin in medium saucepan. Gradually stir in milk; let stand 5 minutes. Cook over medium heat, stirring constantly, until mixture comes to a boil and gelatin is dissolved. Cool about 5 minutes. 

  • 2. Add yogurt and vanilla; stir gently with whisk just until well combined. Pour into dessert dishes. Cover; refrigerate 6 hours or until set. Top with fruit. 8 servings.

  • MICROWAVE DIRECTIONS: Stir together sugar, cocoa and gelatin in medium microwave-safe bowl. Stir in milk; let stand 5 minutes. Microwave at HIGH (100%) 3-1/2 to 4 minutes, stirring with whisk after each minute, until mixture is hot and gelatin is completely dissolved. Cool 5 minutes. Gradually add yogurt and vanilla, stirring with whisk until well blended. Pour into individual dessert dishes. Refrigerate about 6 hours or until set. Top with fruit. 8 servings

  • Nutritional Information per serving (1/8th recipe):
  • Calories: 180, Total Fat: 2g, Saturated Fat: 1g, Cholesterol: 5mg, Sodium: 60mg, Total Carbohydrates: 37g, Dietary Fiber: <1g, Sugars: 35g, Protein: 6g, Vitamin A: 2%DV*, Vitamin C: 0%DV*, Calcium: 15%DV*, Iron: 2%DV*
  • *DV = % Daily Values are calculated based on a 2000 calorie diet
  • (Recipe from: HERSHEY'S KITCHEN)
Thursday, August 19, 2010 Valita Gal


INGREDIENTS:
• 1 cup sugar
  • • 1/3 cup HERSHEY'S Cocoa
  • • 1 envelope unflavored gelatin
  • • 1-1/3 cups lowfat 2% milk
  • • 2 containers (8 oz. each) vanilla lowfat yogurt
  • • 1 teaspoon vanilla extract
  • • Kiwi, raspberries or sliced fresh strawberries


  • DIRECTIONS:
  • 1. Stir together sugar, cocoa and gelatin in medium saucepan. Gradually stir in milk; let stand 5 minutes. Cook over medium heat, stirring constantly, until mixture comes to a boil and gelatin is dissolved. Cool about 5 minutes. 

  • 2. Add yogurt and vanilla; stir gently with whisk just until well combined. Pour into dessert dishes. Cover; refrigerate 6 hours or until set. Top with fruit. 8 servings.

  • MICROWAVE DIRECTIONS: Stir together sugar, cocoa and gelatin in medium microwave-safe bowl. Stir in milk; let stand 5 minutes. Microwave at HIGH (100%) 3-1/2 to 4 minutes, stirring with whisk after each minute, until mixture is hot and gelatin is completely dissolved. Cool 5 minutes. Gradually add yogurt and vanilla, stirring with whisk until well blended. Pour into individual dessert dishes. Refrigerate about 6 hours or until set. Top with fruit. 8 servings

  • Nutritional Information per serving (1/8th recipe):
  • Calories: 180, Total Fat: 2g, Saturated Fat: 1g, Cholesterol: 5mg, Sodium: 60mg, Total Carbohydrates: 37g, Dietary Fiber: <1g, Sugars: 35g, Protein: 6g, Vitamin A: 2%DV*, Vitamin C: 0%DV*, Calcium: 15%DV*, Iron: 2%DV*
  • *DV = % Daily Values are calculated based on a 2000 calorie diet
  • (Recipe from: HERSHEY'S KITCHEN)
Calling all maid of honors!  It's time for a Vintage Themed Bridal Shower!


As soon as I saw the pretty little pyramid favor box idea, 
on page 176 in this Summer of 2010 - Martha Stewart's Weddings Magazine
I just knew it this pretty little favor would look adorable with my new 
Printable Vintage Collection party set!


Take a peak at the vintage pyramid box template that i designed...


Along with the rest of the "Do It Yourself" Vintage Collection that includes:

• Invitation & personalization

• Fancy labels / place cards

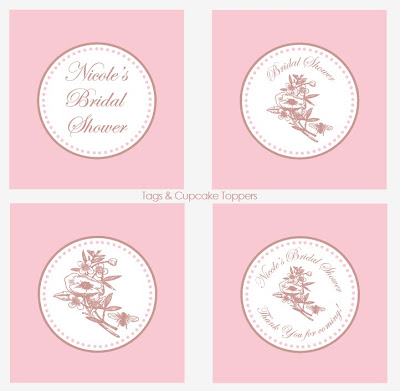
• Cupcake toppers / tags

• Pyramid favor box template & tags for favor

This exclusive vintage collection, is available in the following colors:

Pretty in Pink • Mint Green • Tiffany Blue • Mandarin Orange • Lovely Lavendar


All this has been made available for purchase in my shop for a special introductory price of $12.00 
until Sunday night {original price: $17.00}!


Wednesday, August 18, 2010 Valita Gal
Calling all maid of honors!  It's time for a Vintage Themed Bridal Shower!


As soon as I saw the pretty little pyramid favor box idea, 
on page 176 in this Summer of 2010 - Martha Stewart's Weddings Magazine
I just knew it this pretty little favor would look adorable with my new 
Printable Vintage Collection party set!


Take a peak at the vintage pyramid box template that i designed...


Along with the rest of the "Do It Yourself" Vintage Collection that includes:

• Invitation & personalization

• Fancy labels / place cards

• Cupcake toppers / tags

• Pyramid favor box template & tags for favor

This exclusive vintage collection, is available in the following colors:

Pretty in Pink • Mint Green • Tiffany Blue • Mandarin Orange • Lovely Lavendar


All this has been made available for purchase in my shop for a special introductory price of $12.00 
until Sunday night {original price: $17.00}!


Sweeten up your next event with these delicious Homemade Cake Pops!


Step 1: Bake your Cake


Yellow Buttermilk Cake Ingredients:
• 3 1/2 cups cake flour


• 2 cups granulated sugar
• 1 tablespoon baking powder
• 1/2 teaspoon salt
• 1 cup unsalted butter (2 sticks) room temperature
• 1 cup buttermilk, room temperature
• 4 large eggs, room temperature
• 2 large egg whites, room temperature
• 2 teaspoons vanilla extract


Preheat oven to 350 degrees F. Lightly butter and flour two 8 or 9-inch round cake pans.

In the bowl of your stand mixer, sift or whisk together the cake flour, sugar, baking powder, and salt. Add the butter and half the buttermilk. Beat with the paddle attachment on a medium-low speed until combined and smooth, about 3-4 minutes.

In a medium sized bowl, with a fork, whisk together the eggs, egg whites, the rest of the buttermilk, and the vanilla to combine, just until eggs are broken up. Add the egg mixture to the batter in 3 additions, mixing on medium speed for 2 minutes after each addition, being sure to scrap down the sides of the bowl frequently.

Divide the batter evenly between the two pans, and bake on the middle rack of the oven for 35-40 minutes or until a toothpick or skewer inserted into the center comes out clean. Let cool in pans until they are cool to the touch, then turn out of pans and cool completely on wire racks.

As always, make sure the cakes are completely cool before you attempt the cake pops, otherwise your frosting will melt and you may some some trouble rolling intact balls.
{Recipe found on These Peas Are Hollow by: Culinary Institute of America}


Step 2: Make your Cake Pops


Cake Pop Coating Ingredients:
• 1 can frosting (16 oz.)
• Wax paper
• Chocolate Candy Melts (1 lb. pkg.)
• Lollipop Sticks


Cake Pop Coating Directions:
After cake is cooked and cooled completely, crumble into large bowl.

Mix thoroughly with 1 can frosting. (I use the back of a large spoon, but it may be easier to use fingers to mix together. But, be warned, it will get messy. Also, you may not need the entire can of frosting, so start out by using almost the entire can and add more if you need to.)

Roll mixture into quarter size balls and place on wax paper covered cookie sheet
(Should make 45-50).

Melt chocolate in the microwave per directions on package 
(30 sec intervals, stirring in between).

Dip the tip of your lollipop stick in a little of the melted candy coating and insert into the cake balls. (Insert a little less than halfway.

Place them in the freezer for a little while to firm up.

Once firm, carefully insert the cake ball into the candy coating by holding the lollipop stick and rotating until covered. Once covered remove and softly tap and rotate until the excess chocolate falls off. Don’t tap too hard or the cake ball will fall off, too.

Place in a styrofoam block to dry.

Once dry, draw faces with an edible ink pen and allow ink to dry!
{Recipe by: Bakerella}


~*~


If you're just not into baking your cake pops, then why not check out this online company that takes orders via e-mail and ships directly to your door-steps!


Even Rob Thomas loves them...

Even Warner Bros used their pretty & delicious Cake Pops for their exclusive event...


Other Cake Pops by The Cake Pop Co.


Tuesday, August 17, 2010 Valita Gal
Sweeten up your next event with these delicious Homemade Cake Pops!


Step 1: Bake your Cake


Yellow Buttermilk Cake Ingredients:
• 3 1/2 cups cake flour


• 2 cups granulated sugar
• 1 tablespoon baking powder
• 1/2 teaspoon salt
• 1 cup unsalted butter (2 sticks) room temperature
• 1 cup buttermilk, room temperature
• 4 large eggs, room temperature
• 2 large egg whites, room temperature
• 2 teaspoons vanilla extract


Preheat oven to 350 degrees F. Lightly butter and flour two 8 or 9-inch round cake pans.

In the bowl of your stand mixer, sift or whisk together the cake flour, sugar, baking powder, and salt. Add the butter and half the buttermilk. Beat with the paddle attachment on a medium-low speed until combined and smooth, about 3-4 minutes.

In a medium sized bowl, with a fork, whisk together the eggs, egg whites, the rest of the buttermilk, and the vanilla to combine, just until eggs are broken up. Add the egg mixture to the batter in 3 additions, mixing on medium speed for 2 minutes after each addition, being sure to scrap down the sides of the bowl frequently.

Divide the batter evenly between the two pans, and bake on the middle rack of the oven for 35-40 minutes or until a toothpick or skewer inserted into the center comes out clean. Let cool in pans until they are cool to the touch, then turn out of pans and cool completely on wire racks.

As always, make sure the cakes are completely cool before you attempt the cake pops, otherwise your frosting will melt and you may some some trouble rolling intact balls.
{Recipe found on These Peas Are Hollow by: Culinary Institute of America}


Step 2: Make your Cake Pops


Cake Pop Coating Ingredients:
• 1 can frosting (16 oz.)
• Wax paper
• Chocolate Candy Melts (1 lb. pkg.)
• Lollipop Sticks


Cake Pop Coating Directions:
After cake is cooked and cooled completely, crumble into large bowl.

Mix thoroughly with 1 can frosting. (I use the back of a large spoon, but it may be easier to use fingers to mix together. But, be warned, it will get messy. Also, you may not need the entire can of frosting, so start out by using almost the entire can and add more if you need to.)

Roll mixture into quarter size balls and place on wax paper covered cookie sheet
(Should make 45-50).

Melt chocolate in the microwave per directions on package 
(30 sec intervals, stirring in between).

Dip the tip of your lollipop stick in a little of the melted candy coating and insert into the cake balls. (Insert a little less than halfway.

Place them in the freezer for a little while to firm up.

Once firm, carefully insert the cake ball into the candy coating by holding the lollipop stick and rotating until covered. Once covered remove and softly tap and rotate until the excess chocolate falls off. Don’t tap too hard or the cake ball will fall off, too.

Place in a styrofoam block to dry.

Once dry, draw faces with an edible ink pen and allow ink to dry!
{Recipe by: Bakerella}


~*~


If you're just not into baking your cake pops, then why not check out this online company that takes orders via e-mail and ships directly to your door-steps!


Even Rob Thomas loves them...

Even Warner Bros used their pretty & delicious Cake Pops for their exclusive event...


Other Cake Pops by The Cake Pop Co.